Most producers have a checklist for basic equipment repairs between groups to prevent costly and time-consuming problems later. One commonly overlooked item is the feed delivery system. Whether you choose to have the auger inspected by a service crew or do the work yourself, the following is a checklist of essential feed system maintenance items for producers to consider.
Remove the Feed
The most important and basic procedure for auger maintenance is to empty all the feed from the system. Feed left in the auger tube will draw moisture and cause the auger flighting to rust.
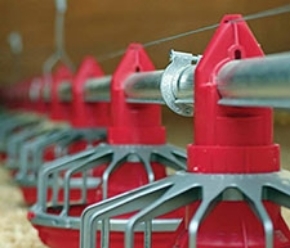
Upper and Lower Boots
The metal lower boots should be visually inspected for worn or rusted areas, bent slide gates and damaged access covers. GrowerSELECT® components can be used to replace individual items including body weldments for all flexible auger sizes. Go to GrowerSELECT Unloader Components.
Grower Select clear upper boots can replace existing solid boots so potential problems with feed delivery are easier to spot. Injected from impact-resistant transparent polycarbonate, GrowerSELECT boots will fit any 16” bin opening and are available in 30° or straight models. Go to GrowerSELECT Clear Boots
Anchor Bearings
Auger bearings are a high wear item and should be checked whenever they are squealing or rattling. To inspect the anchor bearing, loosen the U-bolts holding the bearing, pull the bearing out from the tube and clamp a vise grip on the auger to hold it in place. Inspect the anchor bearing for visible wear and excess play. If the bearing needs to be replaced, select a GrowerSELECT anchor bearing that matches the size and brand of your system. Go to GrowerSELECT Anchor Bearings
Flexible Auger
Auger that is more than ten years old or installed with multiple turns should be examined for wear. Examine the auger to look for sharp edges concentrating on the elbow areas. Also check the distance between the flighting making sure this distance has not been compacted or stretched. To remove the auger for inspection; detach the anchor bearing from the auger and allow the auger to retract inside the tube. Go up to the drive unit and open the inspection plate on the control unit. Loosen the hex head bolt on the clamp holding the auger to the tube anchor. Holding the auger solid, rotate the anchor counterclockwise until the auger is free. Go back to the boot area and pull the auger out the back end of the system.
There are several options for repair.
A) Replace the entire auger.
B) Cut out and replace only the worn section.
C) Turn the auger end for end and replace. This will place the worn section of auger in a straight section of the tube instead of in an elbow section.
Grow-Flex™ auger is available custom lengths that are cut to order. Go to Grow-Flex™ Auger
Elbows
Many (most?) 10-year auger systems have duct tape over small holes in the tube where the auger enters the barn. Now is the time to replace the high wearing elbow sections while the auger is removed from the system.
Gear Head Oil
The oil in auger gear heads should be completely replaced every two years. Remove the bottom and side plugs allowing the oil to drain out of the gear head. Replace the bottom plug and refill with oil until it reaches the level of the side plug. Replace side oil plug. GrowerSELECT Gear Oil is specialty 80W-90 oil designed for use in any existing auger gear head. Purchase GrowerSELECT Gear Oil here.
Pinion Gears
It is also a good time for a visual inspection of the pinion gear connecting the motor shaft to the gear head. The teeth of the pinion should be sharply cut; pinions with rounded teeth should be replaced. There is a GrowerSELECT replacement pinion gear for most existing auger systems….Go to GrowerSELECT Pinion Gears
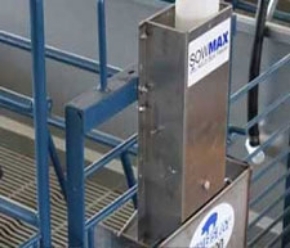
Feed Level Controls
Faulty feed controls can cause feed outages or wastage when they malfunction. There are many options of GrowerSELECT feed level controls available for replacements. The HS529 is a direct replacement for feed level controls mounted in the feeders. The Proxy Plus (HS10) and the Proxy Classic (HS09) are GrowerSELECT replacements for existing proximity switches.
This may also be a great time to consider a complete change in feed control switches. The Grower Select Drop Tube Control Switch (HSDTC01) is an excellent option for controlling the feed system. This type of switch removes the electrical components from inside the feeders helping minimize switch failure due to electrical problems.
Feed Bins
Older feed bins may have rusted areas or even pinholes in the exterior metal sheets. An excellent product to restore these areas and extend the bin’s useful life is AMC100L; an aluminum based coating that provides corrosion and weather protection. It is available in DIY kit form containing 1 quart of AMC100L, 1 pint of rust remover and 4 pieces of seam tape. This starter kit will cover 200-300 sq ft. Purchase the AMC100L-K kit here.
Producers have also upgraded feed bins with a simple feed level indicator called the Bin Flag. This low-cost device (just over $100) allows operators to check bin feed levels without climbing. No wiring is required for operation and the installation is all done from the outside. The Bin Flag can also be connected to building alarm system for dialer notification of feed outages. Go to Bin Flag.
Contact a local Hog Slat store (see store listings) or go to http://www.hogslat.com/feeding-systems-componentsto order feed system repair items. Hog Slat stores also have service crews available for on-farm repairs and inspections.

 Україна
 Méjico
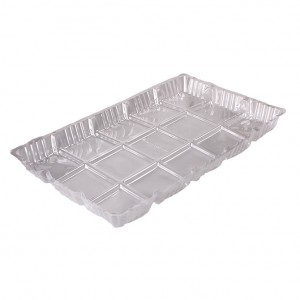
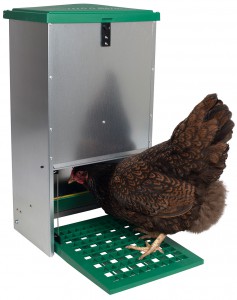
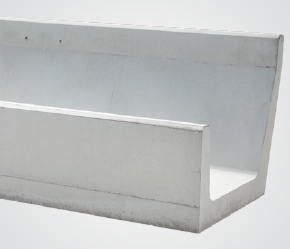
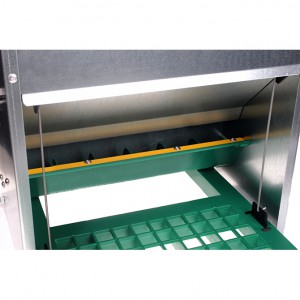 res several refinements to limit feed loss as the chickens are eating. Solid plastic dividers prevent feed from piling up in the corners and falling out. A feed-saving plastic lip on the trough keeps birds from “raking” feed out of the trough as they eat.
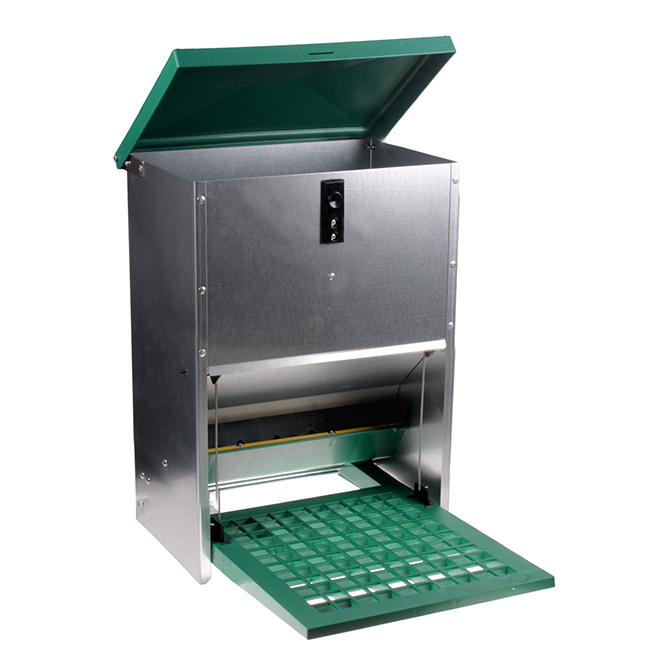 cted of 20 ga. galvanized steel, the Feed-O-Matic holds 26.5 pounds of feed. A plastic lid keeps the feed hopper clean with a snap latch to secure it.


